Star Mood Lamp
For this CA project, I intend to create and build my own mood lamp which is of a starry/space themed.I firstly went ahead to look for references of how people have made their own mood lamp online and got my inspiration from there.
References
Then, i proceeded to think about what kind of features I would want to add on. I thought about add a touch sensor feature whereby, one could simply tap on the Lamp to either change the colours of the light. This would mean that the design would not have any buttons to make it look more seamless. I also thought about have star shapes carved on the top part in order to have some type of shape and space for light to go through.
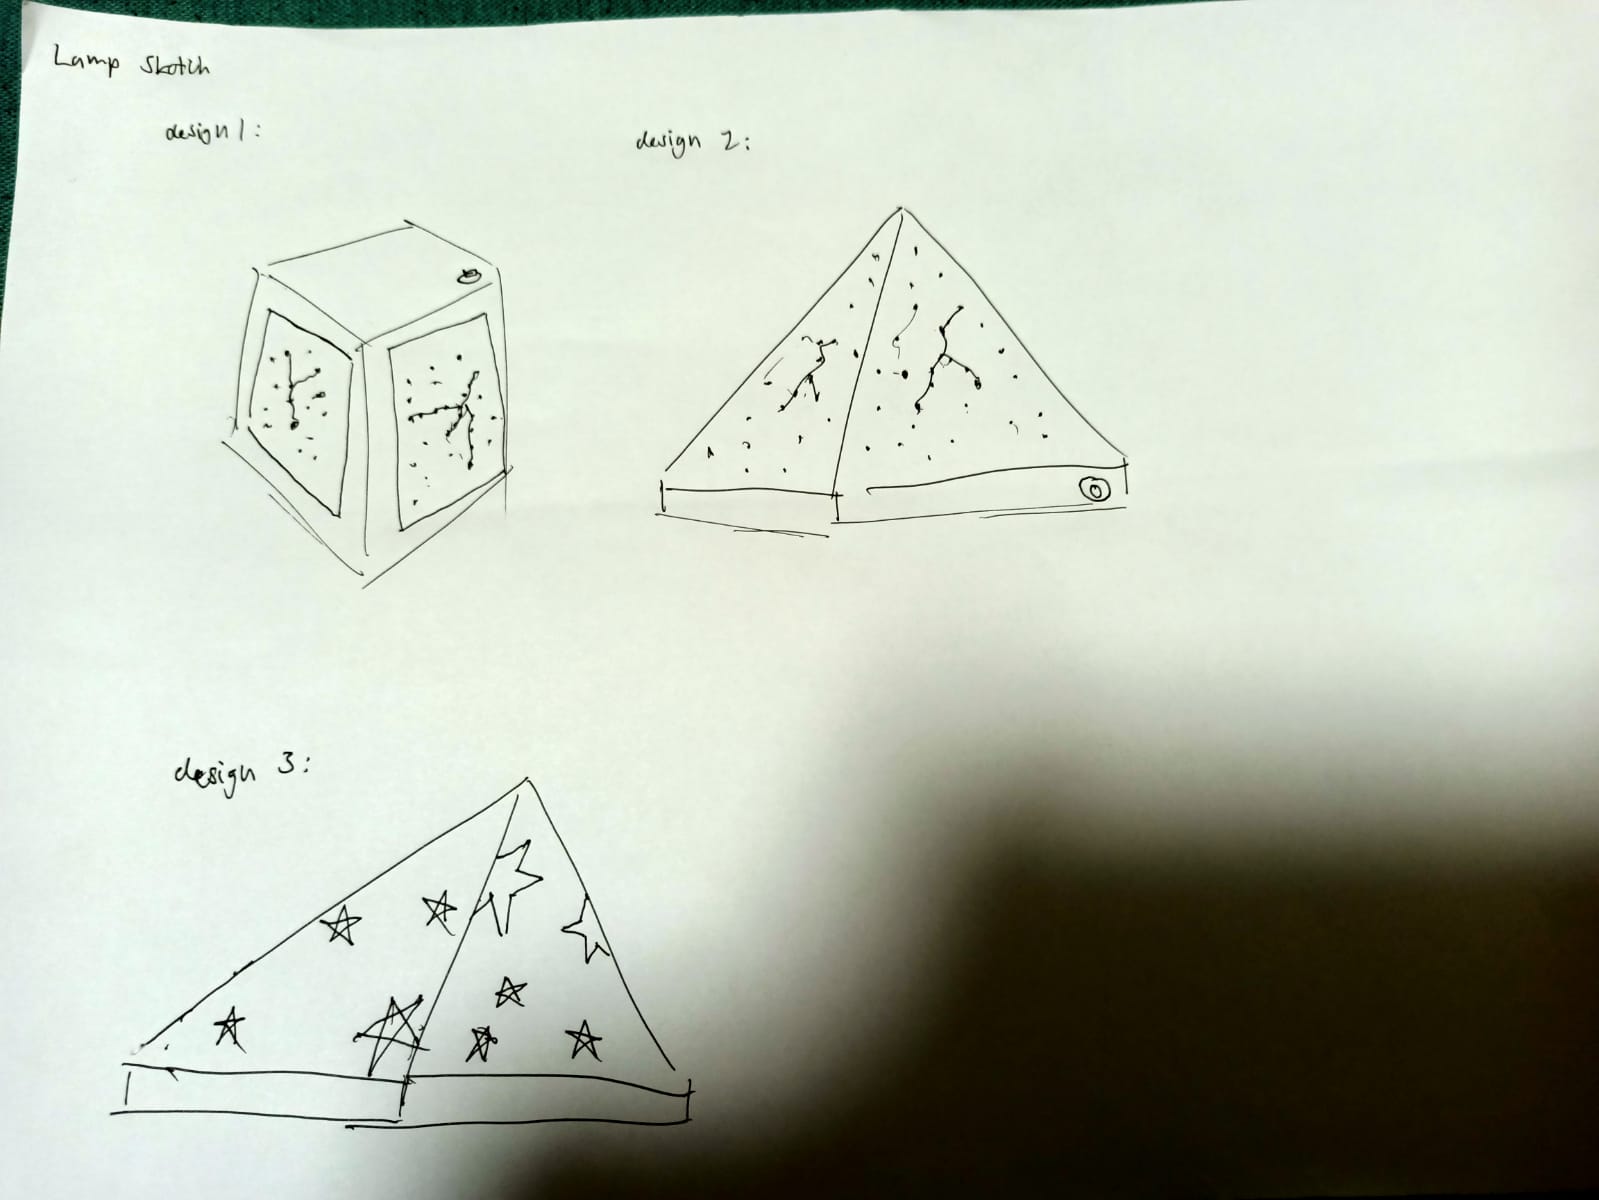
I went ahead and did some sketches on how I wanted it to look like.I have 2 designs in mind, one being the mood lamp to be a vertical cuboid shapes and then have the top part with that stars design.Another having the mood lamp to be a pyramid shape and having the start design being carved on one of the sides. However, I decided to combine two out of the three ideas together, it being having the shape of the mood lamp being a cube and the shape of a star on as the design.
Next, I proceeded to research more about what kind of tools/items are needed to create a mood lamp and plan out the components to do. Here are a list of things that I used:
Components required:
- Neopixels (Ouput Device)
- Touch Sensor Switch (Input Device)
- Jumper Wires
- Arduino Uno
- Breadboard
What I intend to do:
- Base of lamp (Laser cut)
- Top of lampshade (Laser cut)
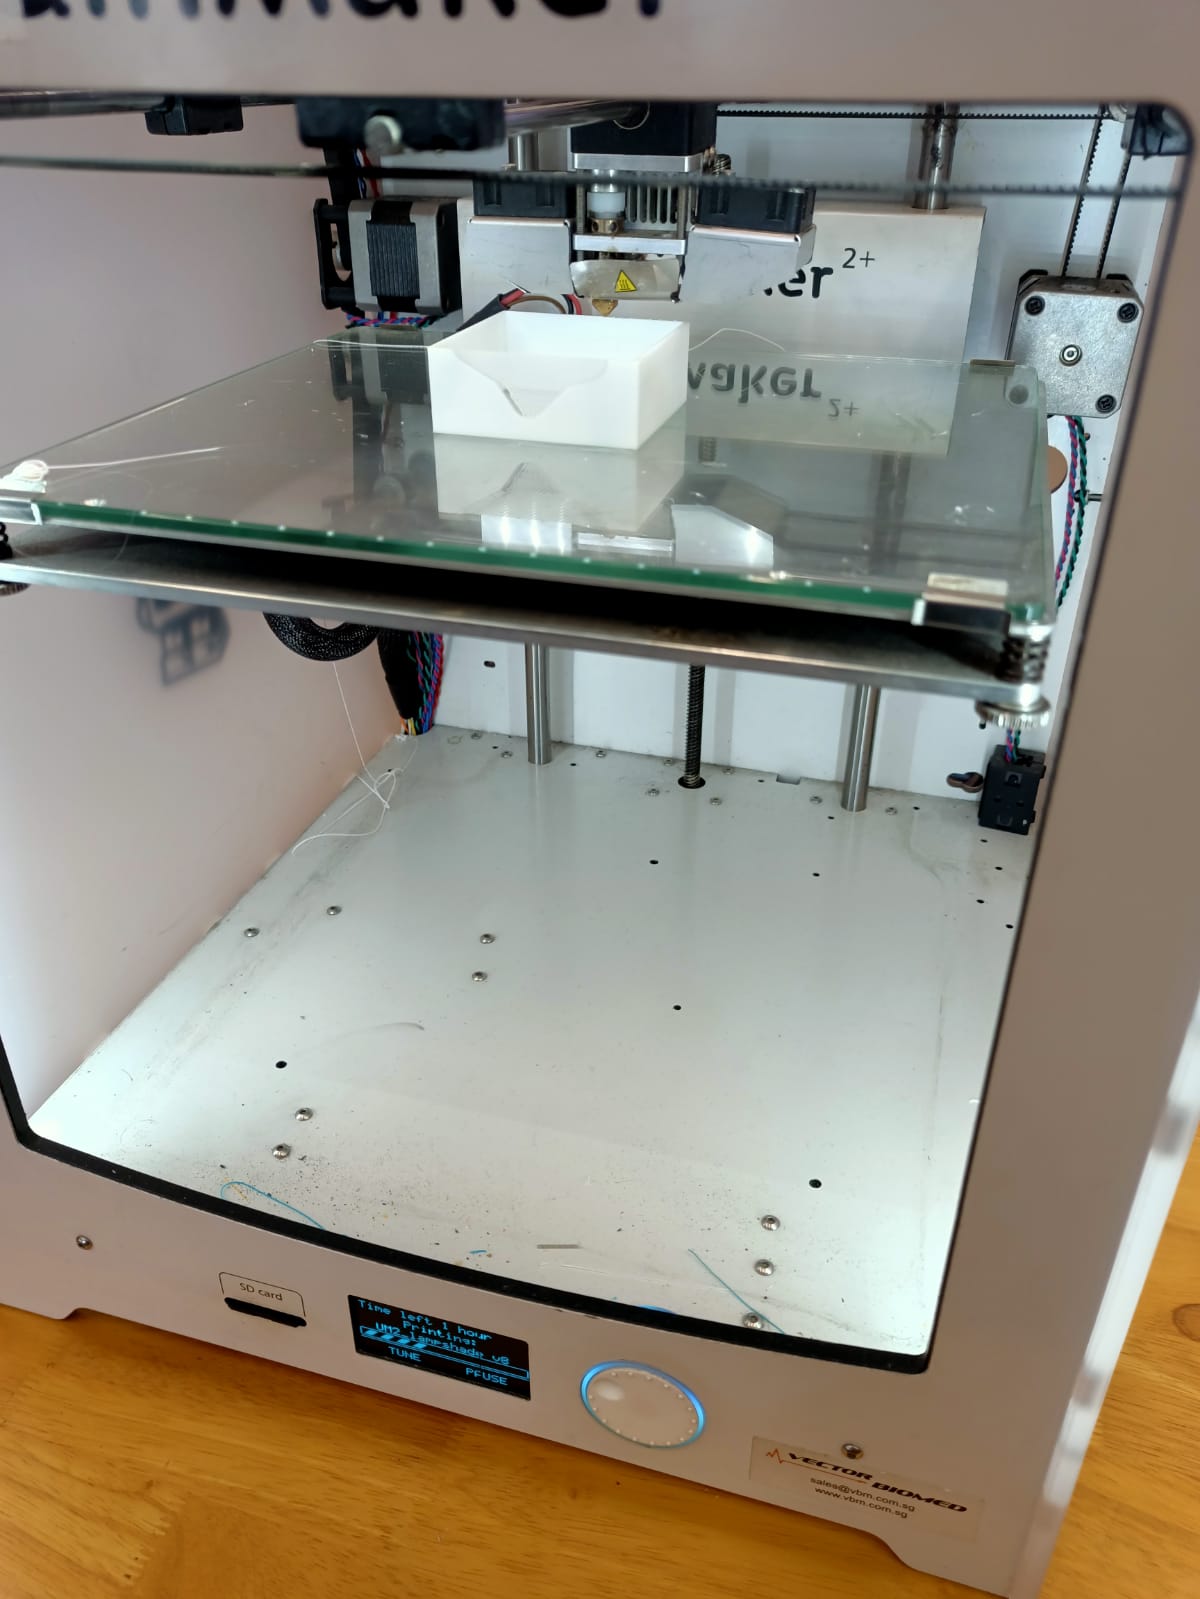
- Lampshade of mood lamp (3d print)
Process
The first step to construct my mood lamp was to sketch the desired design on Fusion 360.
Starting out with the bottom of the base, I measured it out to be 15cm by 15cm in order to fit the Arduino Uno and breadboard nicely. Next, I began to sketch out the sides of the box, not forgetting to add on fingers for each side so that I would be able to join each part when constructing it later.
To work more efficiently, after I sketched out one of the longer and shorter side and extruded to the desired thickness (3mm), I used the midplane feature under 'construct', in order to select the planes I wanted the midplanes to be located to be able to copy the components that I would like to copy across. With that, I added on the top lid of the box, which is meant to be removable and has a hole with a diameter of 6cm to leave some room for the neopixels later.
Moving on to the lampshade, after sketching it out, I extruded it to a height of 5mm and the thickness set to 3mm.The star shape was created using the polygon tool in the sketching process. The rounded corners were achieved through the fillet function and the rounded pattern, to get 5 equal sides.The cover of the lampshade was done by simply sketching out a square and extruding to 3mm thickness.
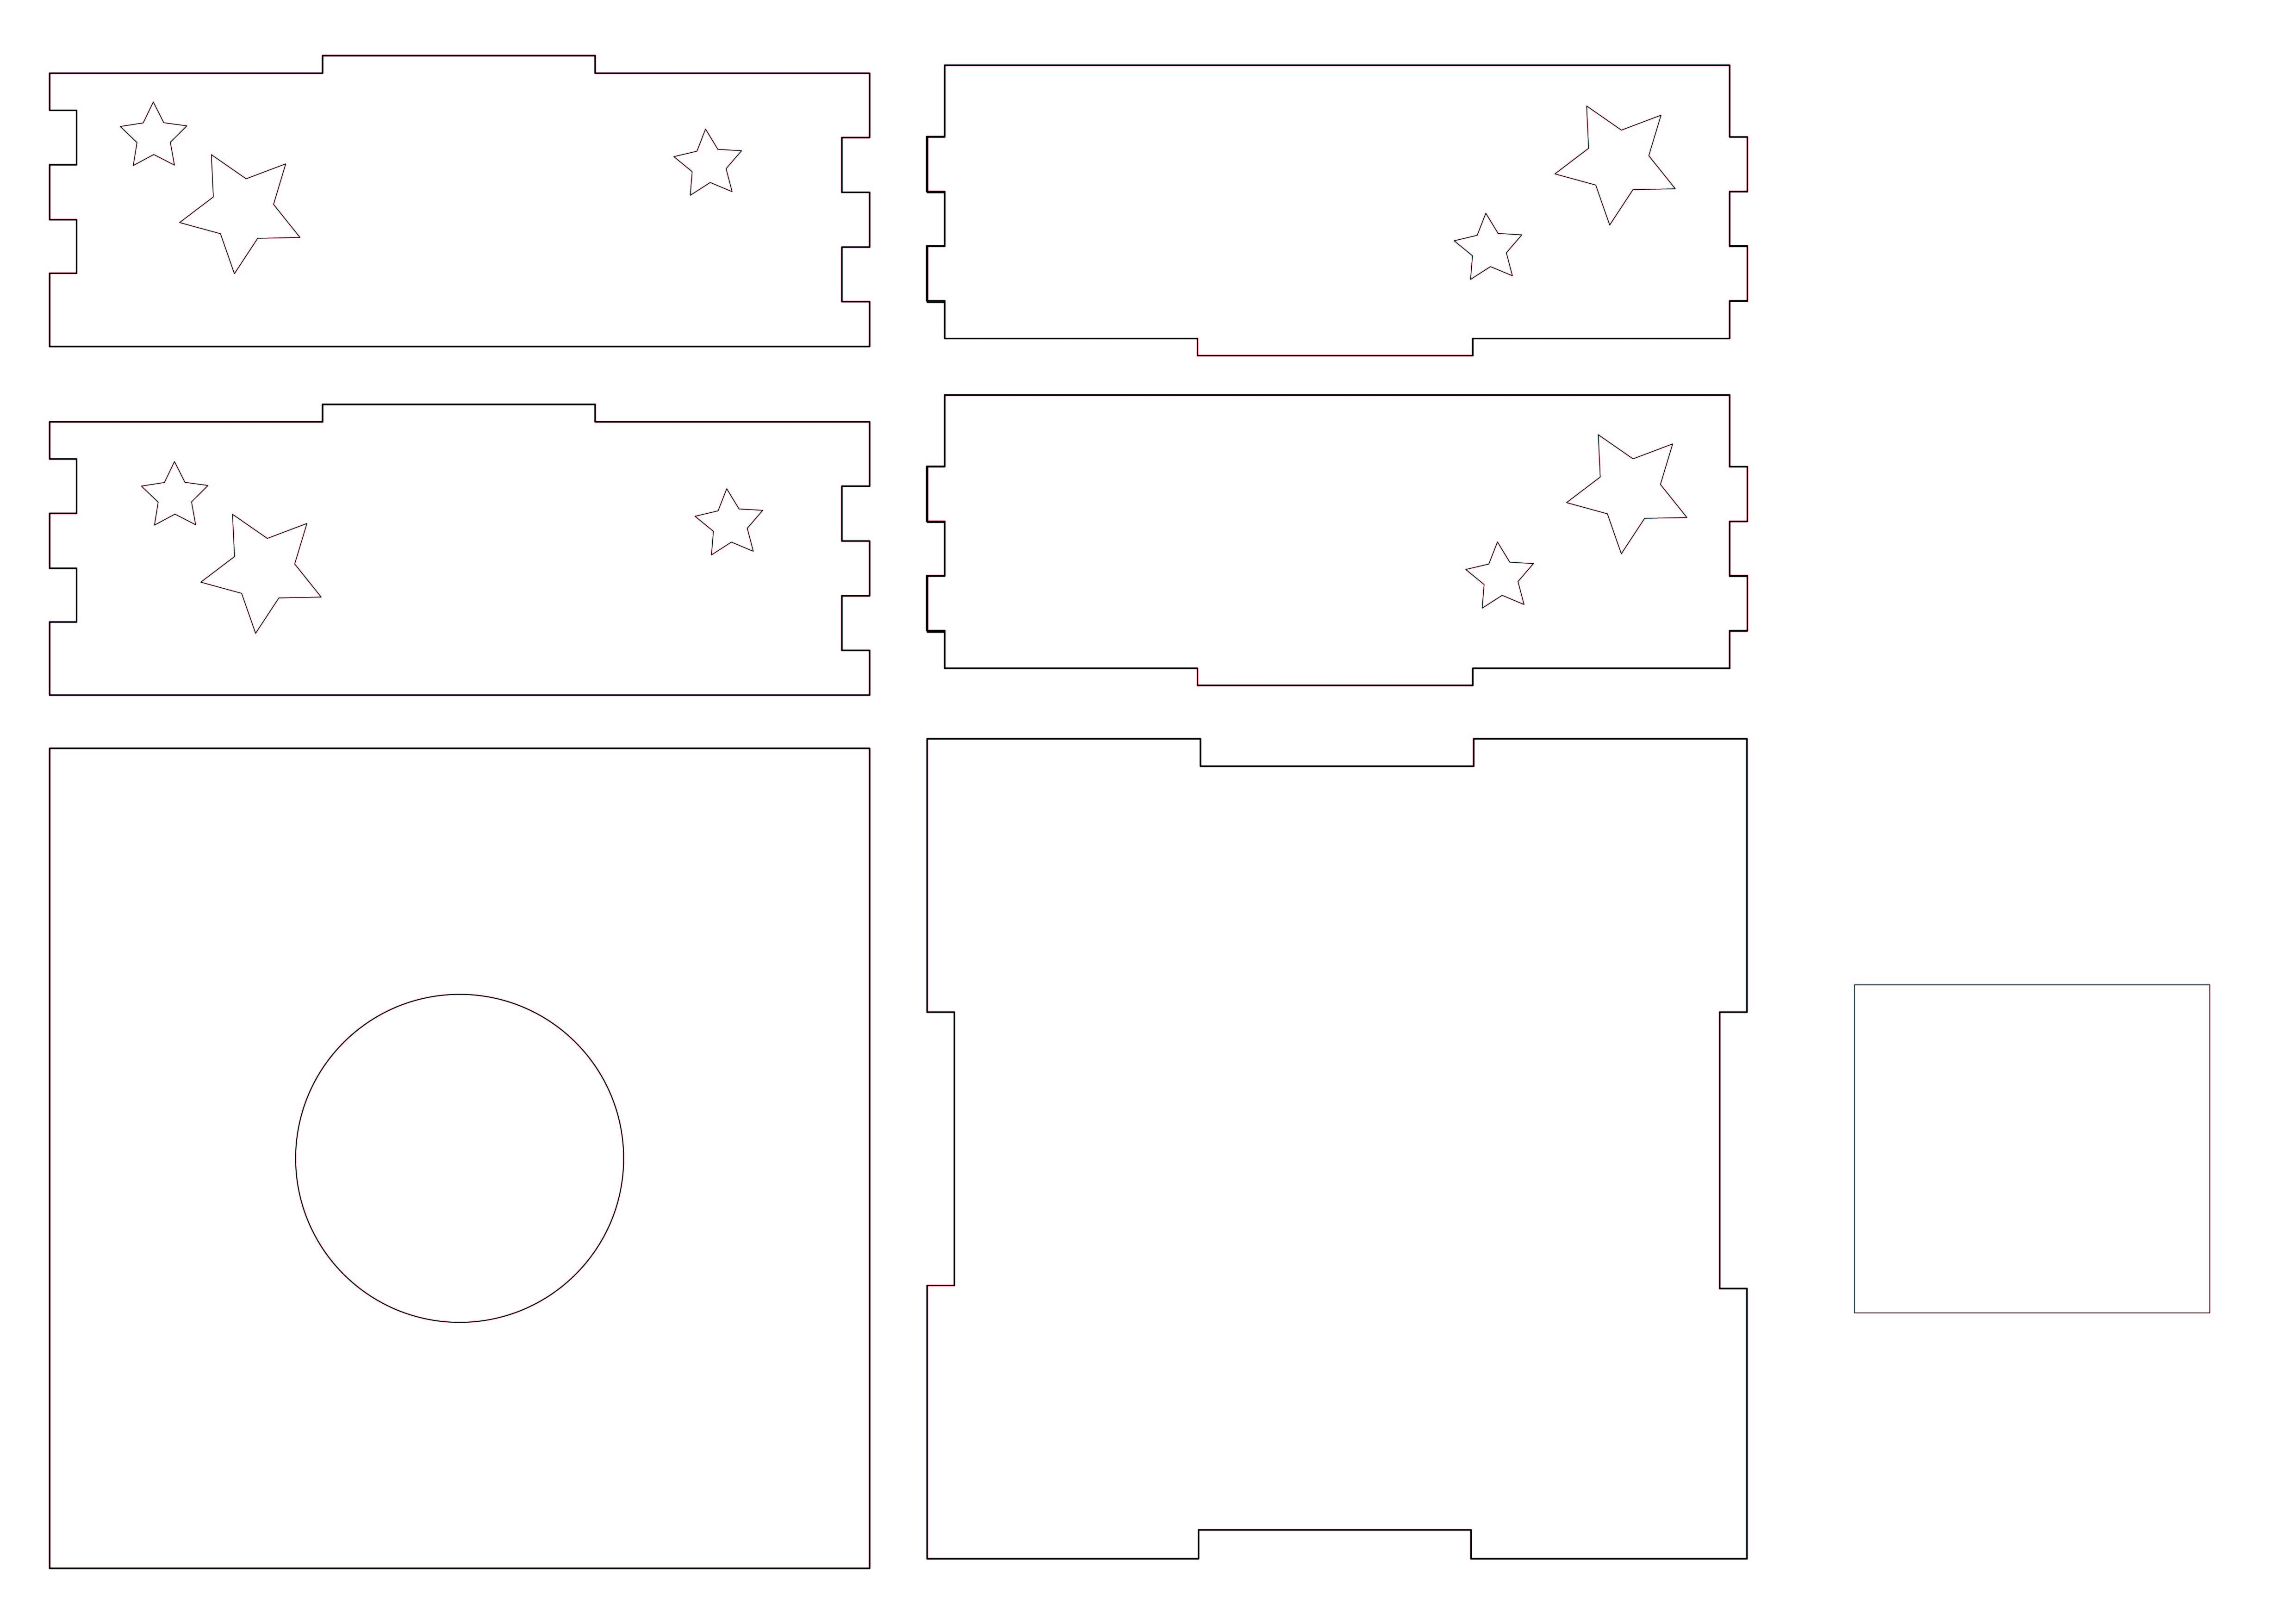
Next up, I exported the sketches to Adobe Illustrator in order to proceed to the laser cutting process. At this stage, I realised that the design might be abit plain, hence I decided to add on star cut outs on the side of the base. The lampshade was then 3d printed, which took around an hour and a half.
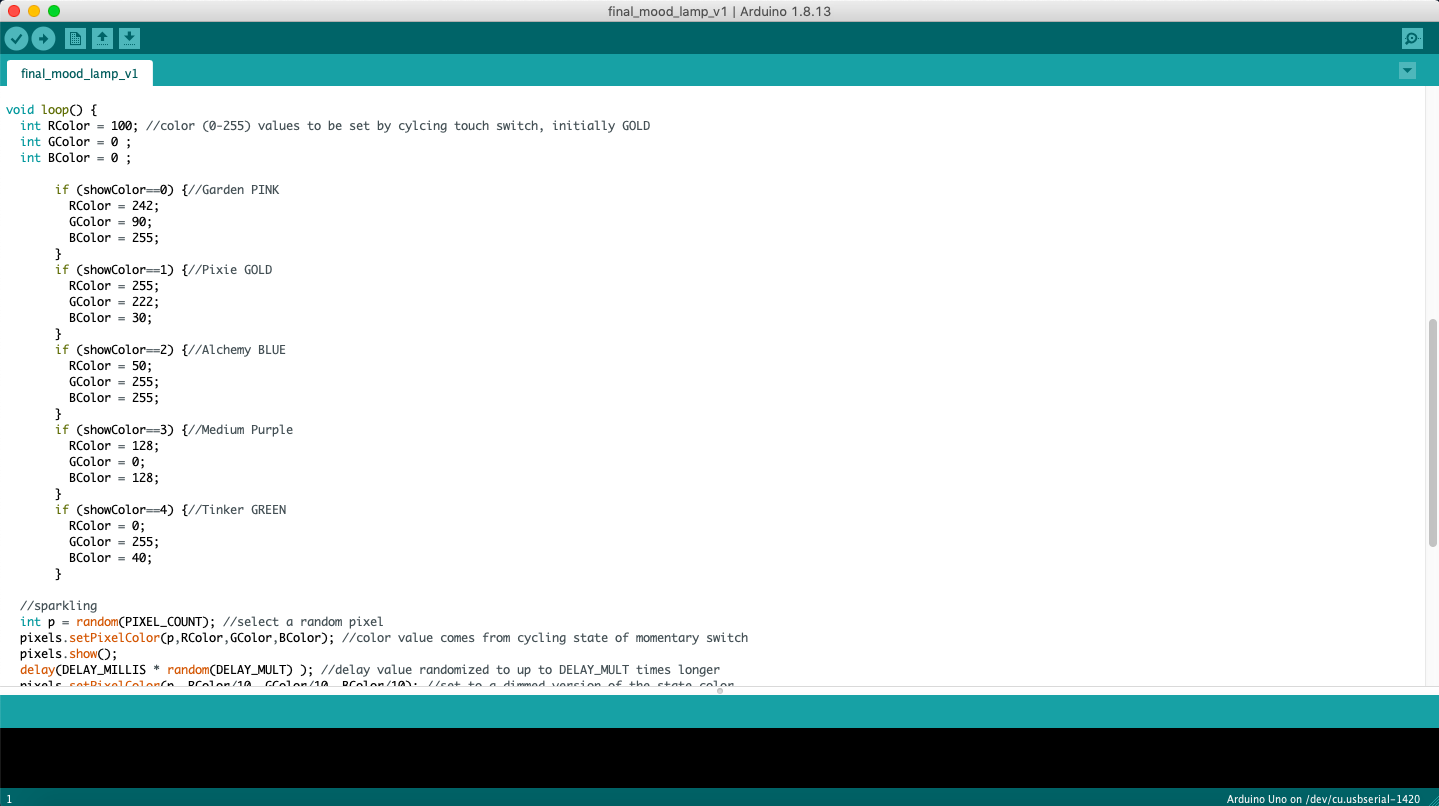
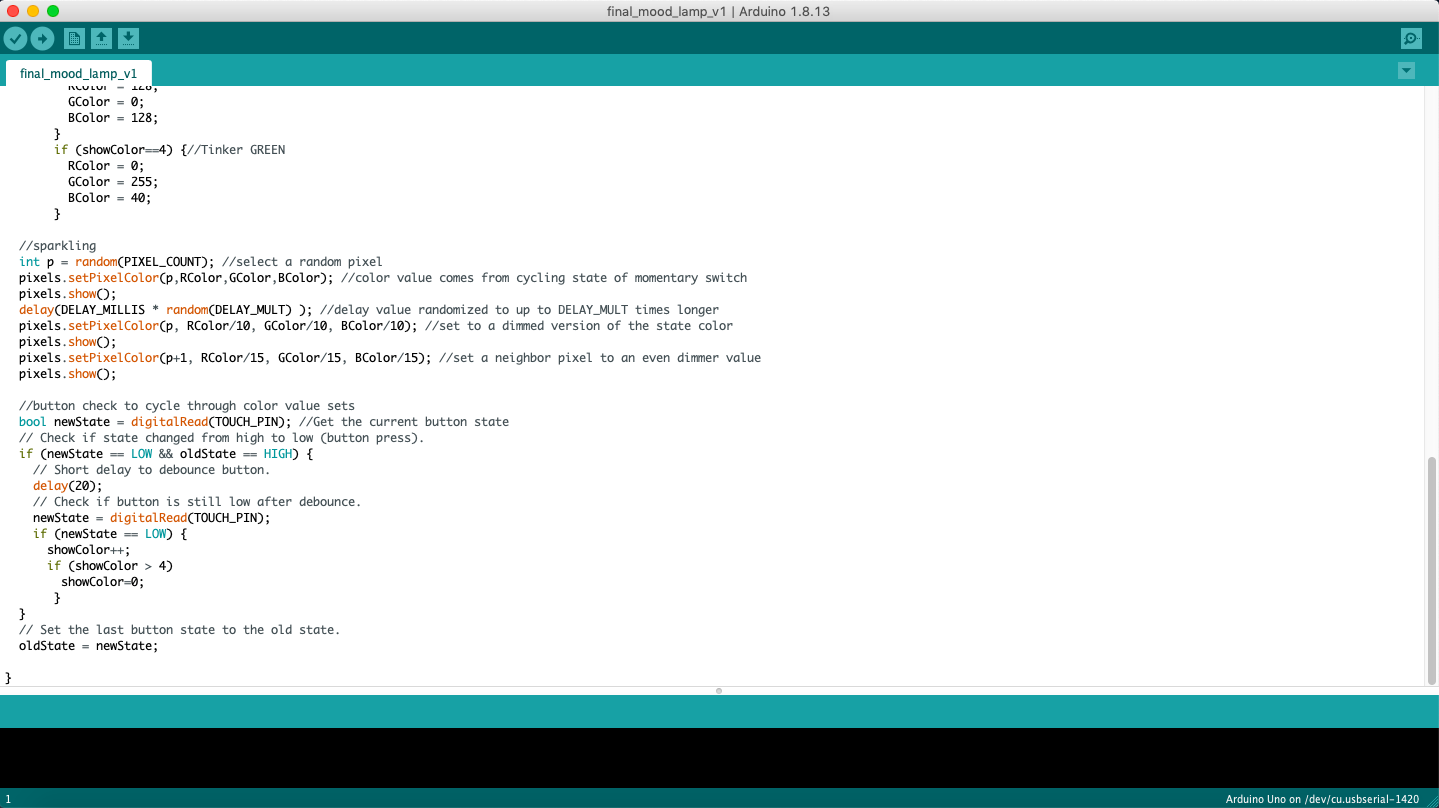
Arduino and Programming process
The arduino was done through firstly connecting the ground and 5V to the breadboard. The neopixels were then connected, having the first jumper wire on the ground, the second on pin number 6 and the last one on the 5V.
The touch sensor device was then connected through three jumper wires, on through the breadboard, on the ground, the 5V and lastly the middle on on pin number 4.

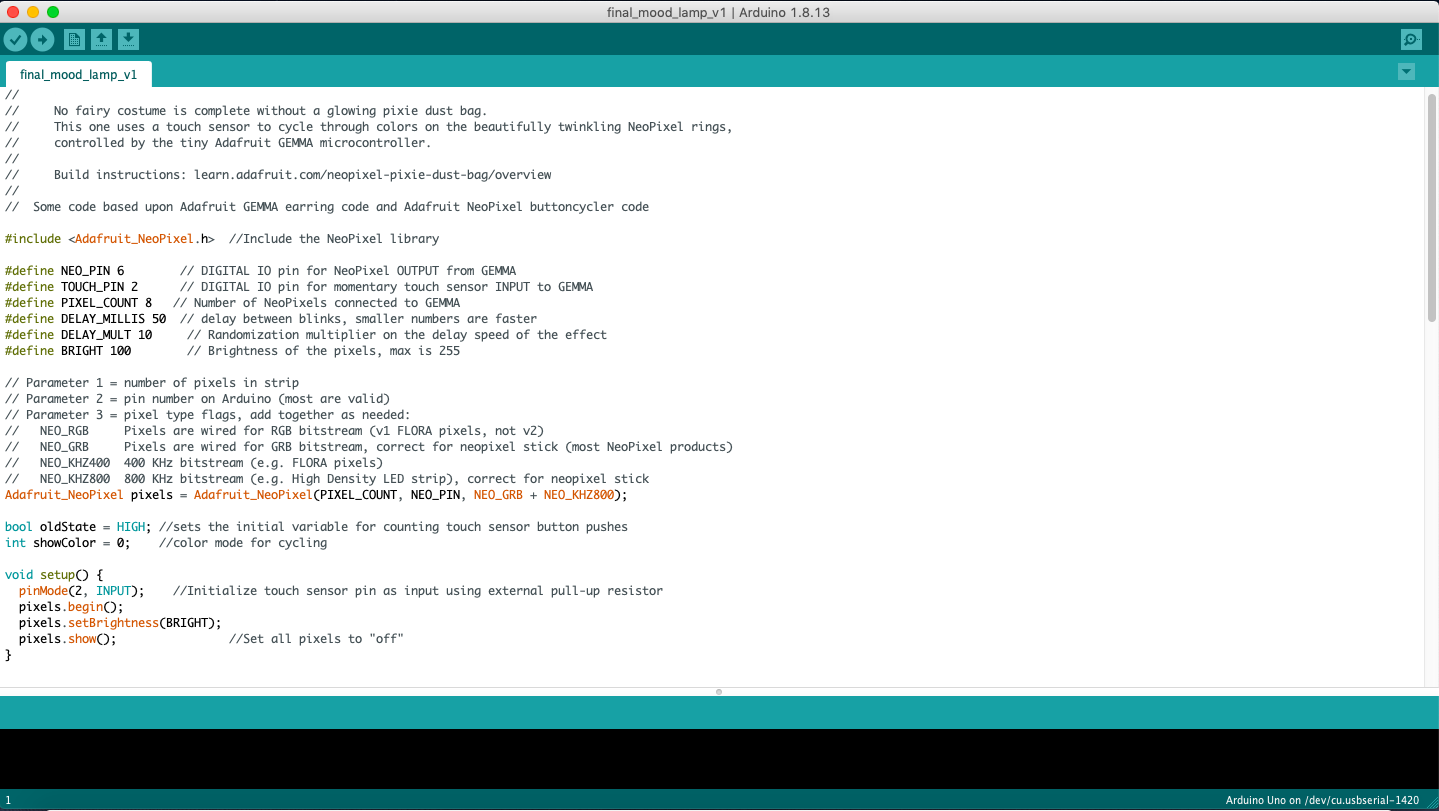
As for the programming and coding, it was done through using one of the libraries found on adafruit, which was developed by John Park. It was made such that the neopixels would twinkle and changes colour when one touches the sensor.I changed certain parts of the codes to customise the colours wanted as well as the speed and amount of blinking for the neopixels.
The Final Product
This was how my final mood lamp turned out to be:
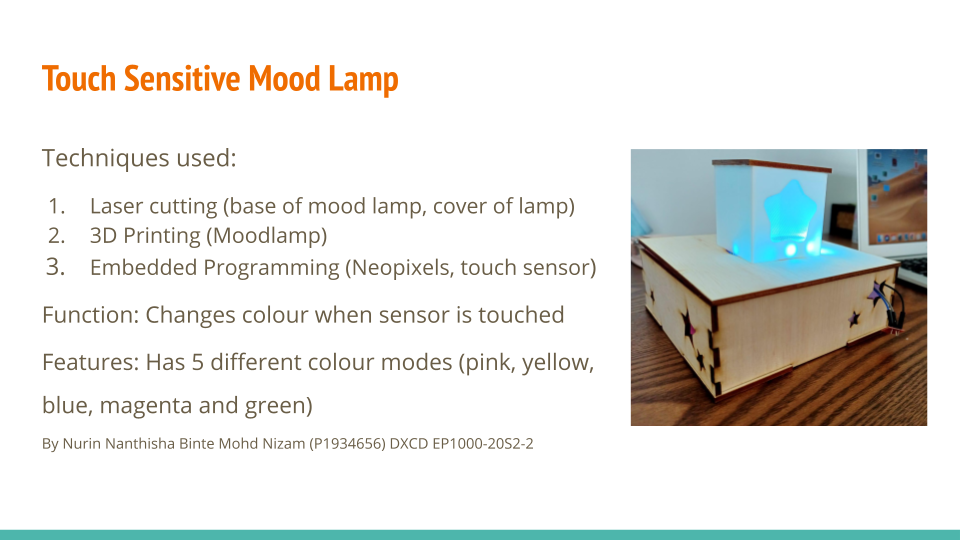
Some of the things I would improve on would be the structure of the base of the mood lamp as one of the shorter sides was done wrongly and the measurements were off by abit, hence one part of the box is elevated slightly. I also forgot to consider to put a space where the arduino cable would exit and connect to the laptop.
The connection between the touch sensor and the wires were also loose, hence I faced some difficulties it and had to resort to manually touch the wires in order to change the colours of the mood lamp.